

Welcome to the Photosphere Explorer tutorial/walkthrough!
This tutorial was made with Unity 2019.2.5f1, and will be updated as necessary with new versions.
Getting Started
Import the Digital Heritage - Photosphere Explorer package into your project.
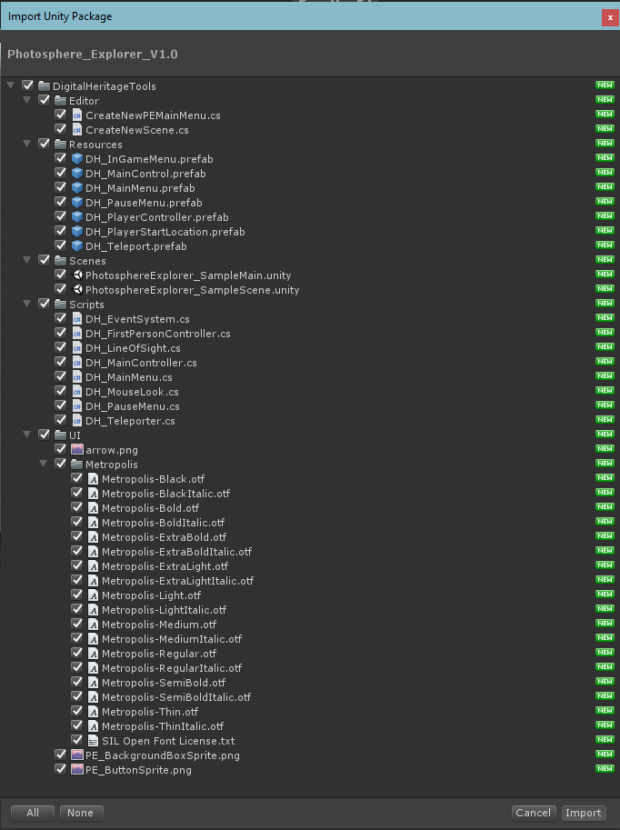
List of game objects, scripts, scenes, fonts, and images that are part of the Photosphere Explorer package.
You will also need Unity's Standard Assets. It is available for free on the Unity Asset Store.
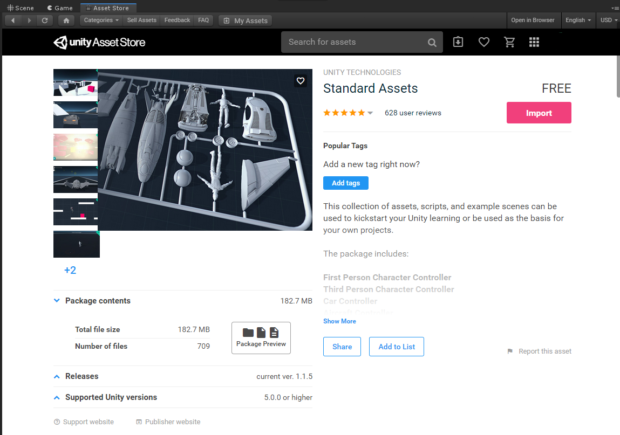
Unity's Standard Assets is available from the Asset Store.
Now you're ready to create a Main Menu.
Create a Main Menu
Create the Main Menu Scene. In your project folder, right-click inside it -> Create -> Scene. Double-click to open this scene and begin working.
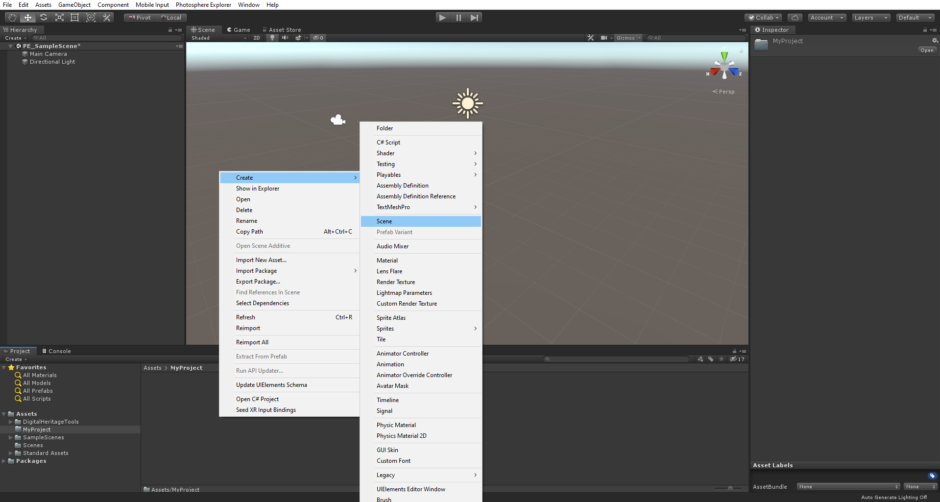
Creating a new scene.
You should see a menu item called Photosphere Explorer. Select the Create New Main Menu option. This will open a window that can be docked.

Create New Main Menu option within Photosphere Explorer's menu.
This menu is simple. Select the yellow button Add Main Menu. Switch to 2D view (button is at the top of the Scene Window) and double-click on DH_MainMenu in the Hierarchy to make it visible.
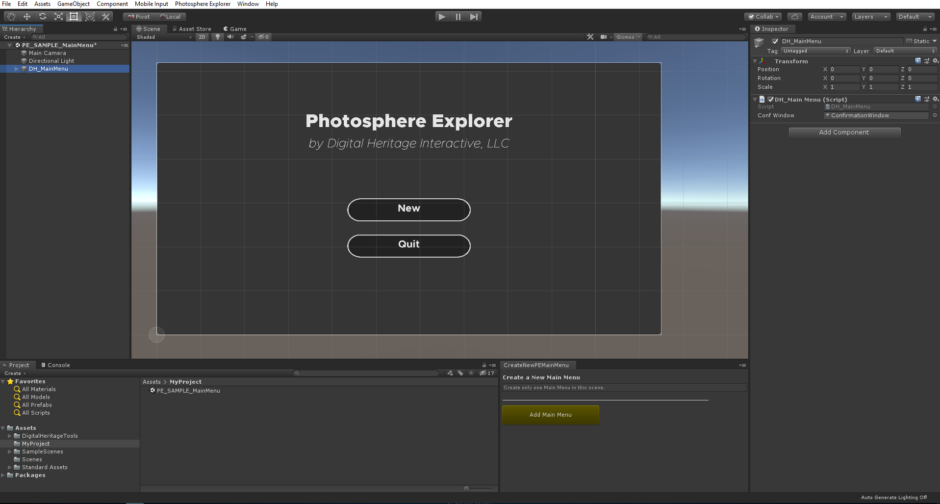
Selecting "Add Main Menu" automatically creates a customizable main menu UI.
Be sure to save your scene. If you like, you can now close the Create Main Menu window by right-clicking the tab -> Close Tab.
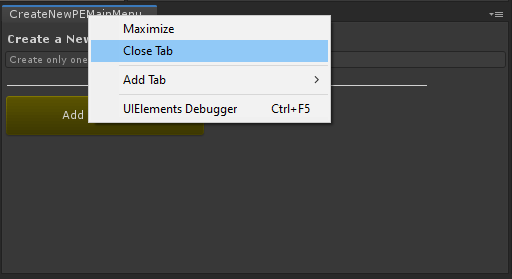
Optional step of closing windows that you no longer need.
Now you can create a photosphere scene.
Create a Photosphere Scene
Create another scene in your project folder and open it.
Remove the default main camrea in the scene and add your surface. In this example, we are using a quad because they are less resource intensive than other 3D flat surfaces. (You can find it by selecting GameObject from the main menu, then select 3D Object -> Quad. You may need to rotate it for it to work properly as a surface.
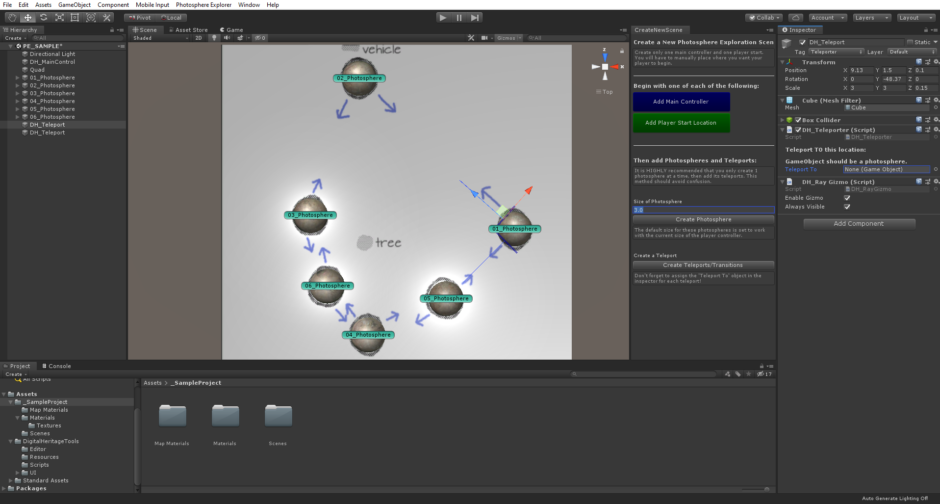
Now we need the Create New Scene window. Select Photosphere Explorer from the main menu, then select the Create New Scene option. This window can be docked as well.

Photosphere Explorer Menu and Creating a New Scene.
Add one Main Controller by clicking the blue button. DH_MainControl should appear in the Hierarchy window.
In the inspector for DH_MainControl, ensure that DH_InGameMenu, DH_PlayerController, and DH_PauseMenu are in the inspector fields. If they are not, simply drag the appropriate prefabs from the Resources folder into the corresponding fields.
You can customize these or create your own menus and HUD prefabs and link them to the DH_MainControl.
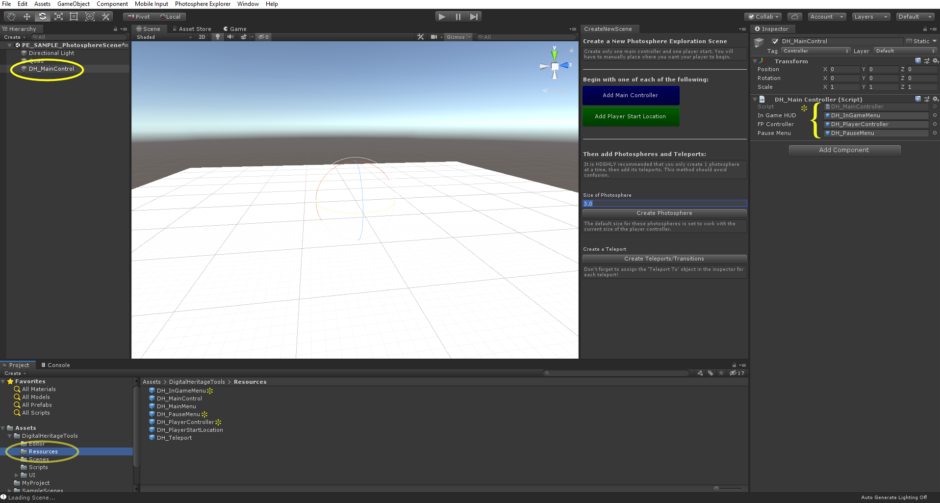
Ensuring the DH_MainControl object has the right prefabs assigned to it.
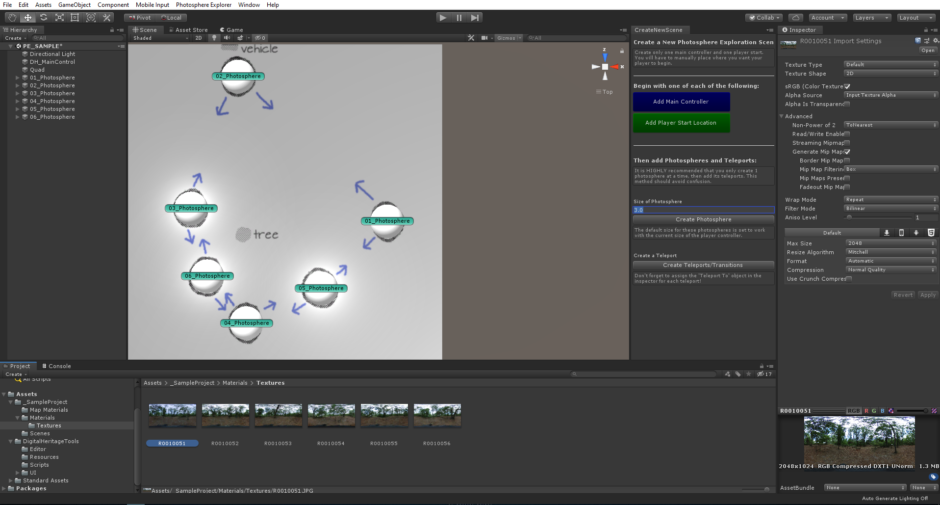
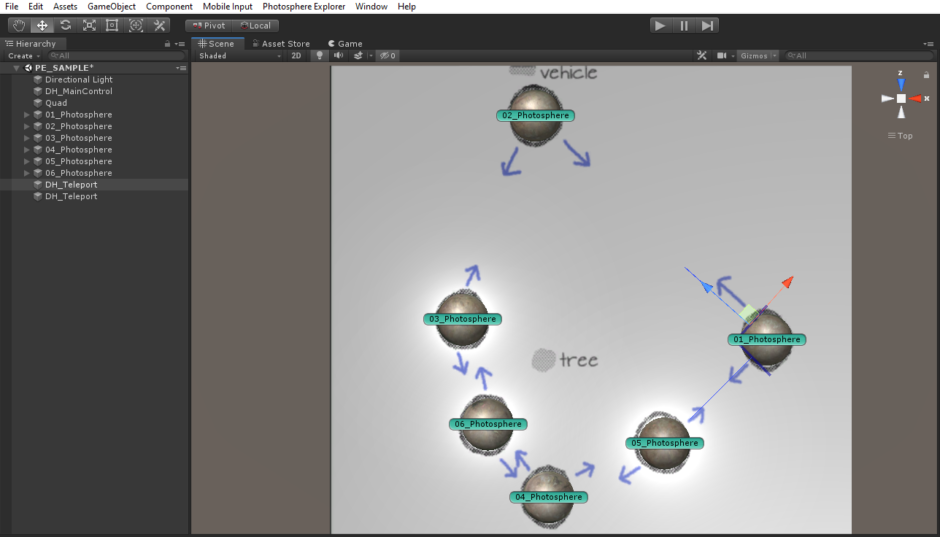
We recommend using a computer generated map (with GIS) or creating a sketch of the final layout of the 360 degree images. Here's a sketch of the ones we're using in the sample scene. Creating the sketch will help us build the scene step by step.
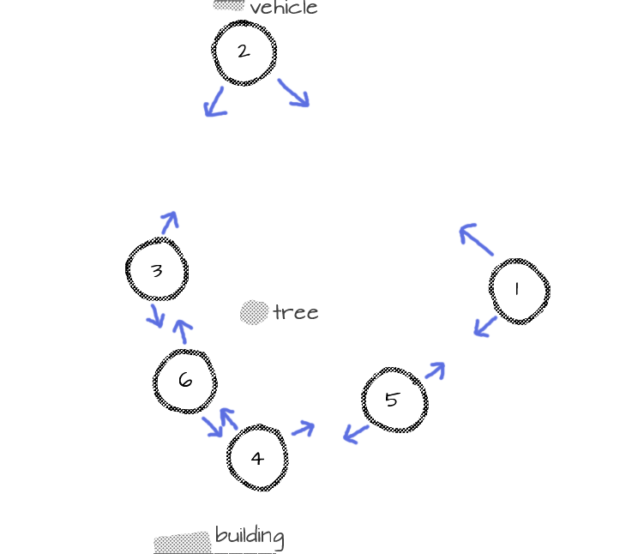
Sketch of where we took the 360 photos along with the travel paths.
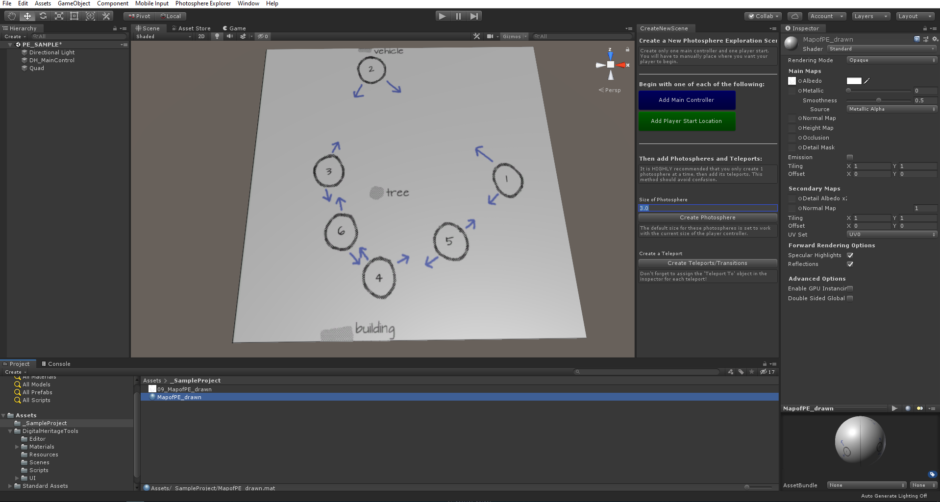
Surface with sketch map applied to it.
Add Photospheres
In the Create New Scene window, select Create Photosphere then drag it along the x and z axes to place it over the first location.
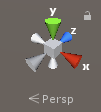
Unity's Scene gizmo lets you change the viewing angle and projection mode.
Hint: The gizmo in the top-right corner of the Scene window allows you to quickly change view and perspective. Selecting the green "Y" inverted cone and selecting "Persp" will create an isometric view looking straight down at your map. Moving the photospheres should be a lot easier now!
To make distinguishing each of the photospheres easier, right-click the new photosphere in the Hierarchy window and select rename. In this instance, we are calling it "01_Photosphere". The name can be anything that allows you to keep track of its location or order.
Create and position photospheres until you have created all the spheres required for your map.
In your project folder, create a folder called Materials. In that folder, create another called Textures. Upload your 360 degree images to this folder. In the sample project, we have 6 total.
Adding Textures to appropriate folder within the Assets folder.
Create as many materials as required by your project by right-clicking in the Materials folder -> Create -> Material.
Assign the appropriate texture by dragging the texture into the material's Inspector. Specifically, drag them into Albedo and Emission (accessible by clicking the box). Do this for each material/texture you have.
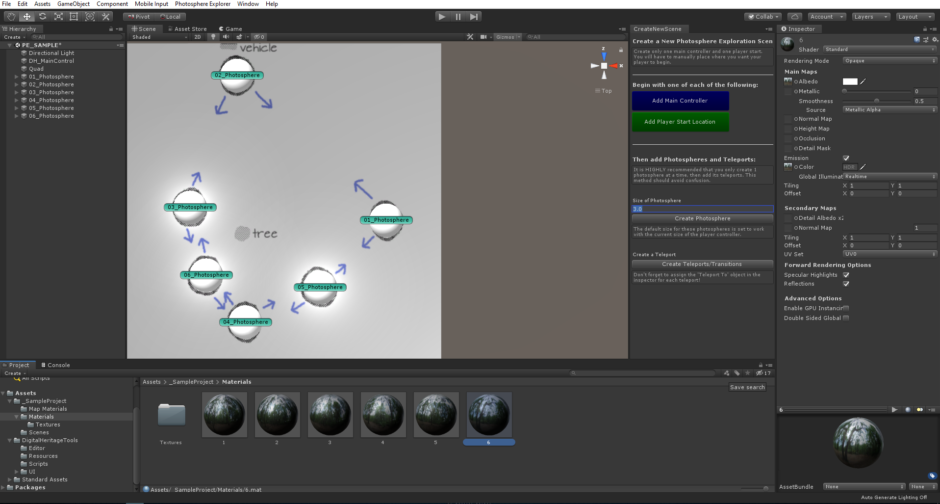
Materials with corresponding Textures assigned.
Now, drag each material onto the appropriate photosphere. In this case, they are numbered the same as the photosphere game objects, so material 1 goes to 01_Photosphere, material 2 to 02_Photosphere, and so forth.
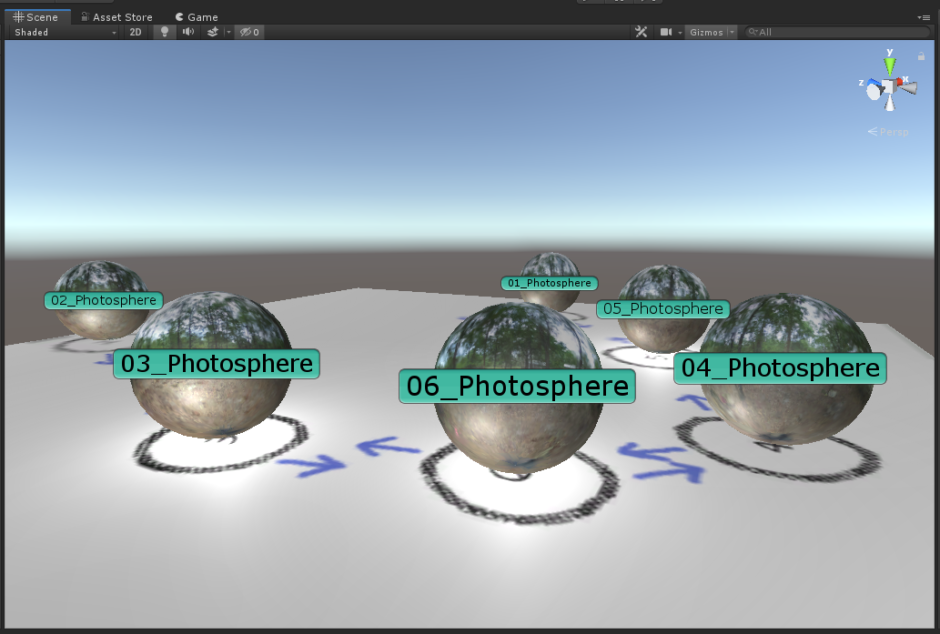
Properly placed photospheres with appropriate materials assigned to them.
Now you are ready to create teleports!
Add Teleports
Now, begin by creating teleports. First, we will create the two associated with 01_Photosphere. Select Create Teleports/Transitions from the Create New Scene window. Rotate the teleport box so that it intersects with the photosphere just slightly and aligns the blue line with the direction of travel.
Position the Teleport the same way as the Photospheres, making sure it is aligned properly.
Now we want to tell the teleport where to take the player. 01_Photosphere has a teleport that faces the upper-left corner of the window, and is pointing to 02_Photosphere. With that teleport object selected, drag 02_Photosphere from the Hierarchy into Teleport To in the Inspector of the teleport object.
Here, the teleport that points to 02_Photosphere is selected. Its inspector information is visible on the right, with Teleport To currently blank.

In this image, 02_Photosphere has been dragged from the left column (Hierarchy) into the blank Teleport To slot.
01_Photosphere's other teleport faces the bottom left corner of the screen, and is pointing to 05_Photosphere. For this teleport, 05_Photosphere should be dragged into the Teleport To field.
Repeat this process until all photospheres are linked with teleports and the Teleport To fields are assigned with the appropriate photosphere.
[Optional] The list of game objects in the Hierarchy are quickly bound to get very long and really confusing as you continue making teleports. There are many organizational solutions, but here we'll offer a relatively simple one.First, right-click in the Hierarchy window and select Create Empty. In this instance we'll rename it to 01_Teleports. In its inspector, click the cog in the upper-right corner and select Reset. This will zero out its position and make it a useful container object. Finally, in the Hierarchy, drag the teleports you created for 01_Photosphere into 01_Teleports.
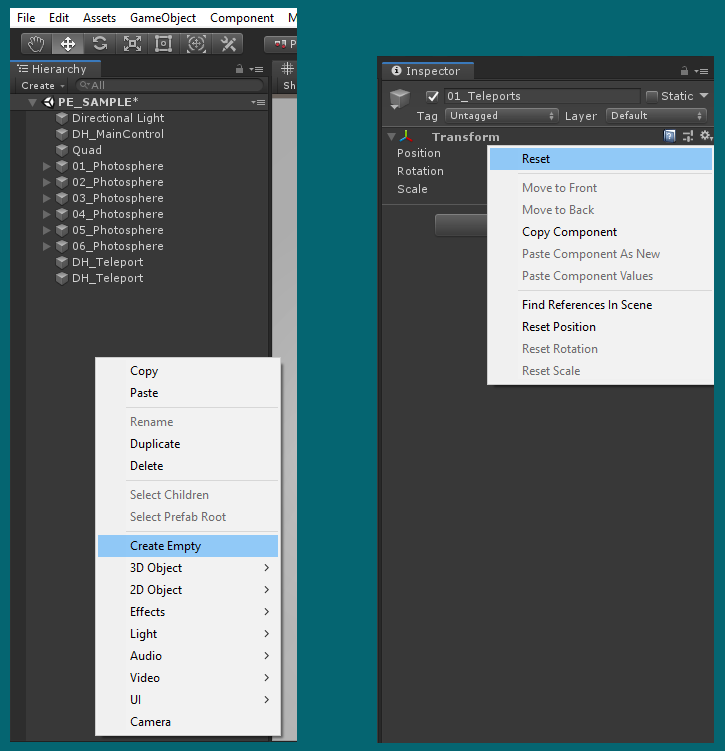
Create an Empty Game Object and then Reset its transform. It works as an organizational container.
For every teleport/transition you have, repeat this process until every transition has been placed, rotated, organized, and has its appropriate destination saved in its Inspector window.
This may be the most tedious part, but you are nearly done! When you've completed this portion you're ready to finish up.
Finishing Up
In the Create New Scene window, select the green button, Add Player Start. It is at height (Y transform position) that works with the default player controller and photosphere sizes, so that value does not need to be changed. However, the player start game object needs to be moved inside a photosphere. In our case, we want to start at 01_Photosphere. The easiest way to do this is to simply copy the X and Z transform values from the photosphere to the Player Start game object.
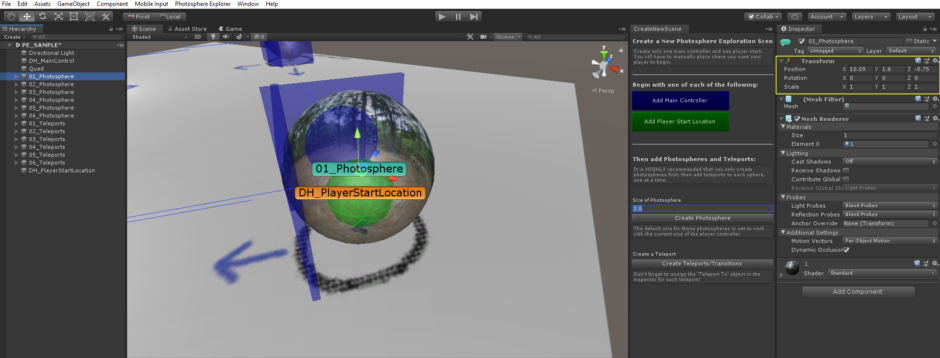
The X and Z position values are what we want to copy. (In our case, they are: X = 10.09 and Z = -0.75).
The directional light in the Hierarchy window is useful when building or editing your scene, but it does distort the lighting inside the photospheres. You can delete this object now (if you need it again, right-click the Hierarchy -> Light -> Directional Light), or you can change its tag in the Inspector to Editor Only. This means it won't be added to the final build, but will remain in the scene.
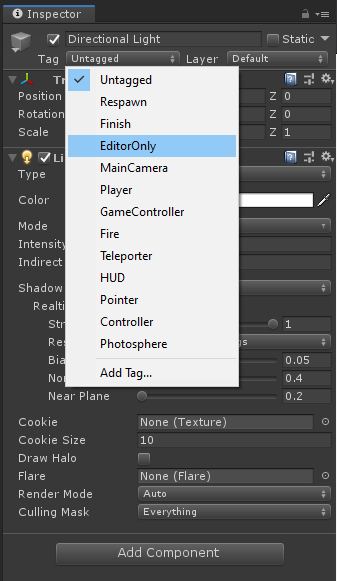
Setting the Tag of the Directional Light to "EditorOnly" means that it will only be visible while editing your scene - not in the final build.
We are nearly ready to build the final project! Select File -> Build Settings... then open your Scenes folder. Drag the Main Menu scene into the Build Settings window first, then the scene with photospheres.
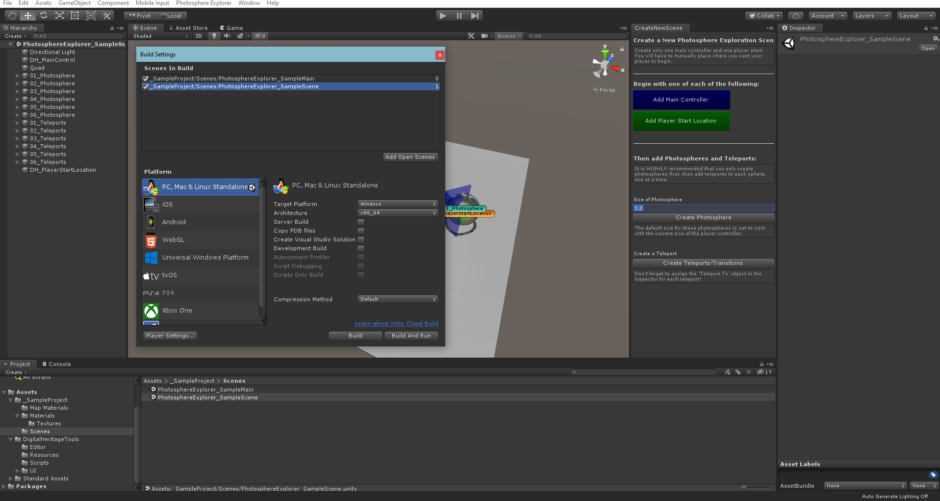
The scene that contains the main menu MUST be first (0 in the load order).
In the Build Settings window, select the target platform, then select Build. Select where you'd like to save your build. It will take a little bit of time to complete this process.
Enjoy and share your new 360 degree tour!